Revival

Dedicated to reviving the lost art of self-reliance.

2-17-13 Lowcountry Fruit Growers Society (Pineapples) February 18, 2013

Filed under: Gardening — revivalnatural @ 9:02 pm
Tags: , , , ,

Yesterday was the third meeting of the Lowcountry Fruit Growers Society.  The main topic with how to grow your own pineapple fruit and a presentation was given by Kathy Woolsey.  Kathy has a website of her own http://www.CypressGardner.blogspot.com.  She did some great demonstrations and gave tips on how to grow your own pineapples started with a pineapple from the grocery store.  She gave some really great tips including how to pick out a good pineapple at the store.  I would like to pass on those interesting facts and tips on to you guys, so here goes.
To get a good pineapple at the grocery store make sure it has  some yellow on it and make sure you smell the pineapple.  It should smell sweet and delicious when you smell it.  It is always very important to smell your produce.  If it doesn’t smell good it probably won’t taste good either.
If you plan on keeping the top in order to grow a pineapple, make sure that the tops in pretty good shape in has a nice shape to it.  Before getting the core of your pineapple, which it helps to have a special tool for, cut off the top of the fruit.  After that you can go ahead and eat your pineapple.  If you have a pineapple corer that makes it a lot easier.
After that you can break the edges off of it and this will actually expose little roots that are already growing.

image

Pull off the leaves on about the first inch or so of the stem.  You might find roots growing there as well.  Set it in some damp soil. The soil should be well-drained soil, like a cactus mix potting soil. Make sure that you do not over water your pineapple or you will cause it to rot.
Keep your pineapple in what might seem like a very small pot for the size of it.  This helps get air into the root system, preventing root rot.  In about 4 to 6 weeks your pineapple should be starting to get some pretty good roots on it an after 2 to 3 months your pineapple will be ready to be planted into a 1 gallon pot.  Fertilize your pineapple with a good water-soluble fertilizer about every 2 weeks.  By the time your plant is 6 months old the roots should be filling the pot and ready to go into a 2 gallon pot.
To overwinter a pineapple plan on bringing it inside your home are in a green house or even your garage, as long as it won’t get below freezing.  Stop fertilizing during the winter and expect your pineapple’s growth to slow down significantly.  By spring your pineapple will probably be ready to go into an even larger pot, but always make sure that the roots actually fill the pot it’s already in before transplanting.  You should resume fertilization and place the pineapple in a location with full sun.
Many people are able to get a pineapple to grow but unable to get it to produce fruit.  If you seem to be having this problem try using over ripe apple slices or banana peels in the pot and covering it with sheet.  The fruit will produce ethylene gas which will cause the plant to go into flowering mode.  What’s your pineapple plant produces a flower, make sure that it is outside so the pollinators can get to it.  Poor pollination causes small fruit.  As your pineapple fruit begins to form and gets larger place bamboo sticks around it to keep it from falling over.  For the sweetest fruit, allow the pineapple to fully ripen and turn yellow on plant.  After the first fruit, most pineapple plants will produce 2 or 3 smaller pineapples.


The dangers of damping off

Filed under: Gardening — revivalnatural @ 10:06 am
Tags: , , , , , , , , , , ,

I had expected some problems from leaving my seedlings out in the storm a couple weeks ago and now I have many of them falling over dead.  They are a sad sight indeed.

image

One of the cucumber plants is going to make it but the rest are in bad shape.  One other one might pull through.  The healthy one is in the front and the one that I still have hope for is to the right of it.  The others, in the background are basically dead already. 
The Roma tomatoes were hit pretty hard too.  Only one is left standing and it is looking pretty sad too.

image

I have lost some others as well but those seem to be the worst off.  Most of the peppers look ok and some varieties of tomato seem to be doing very well.

image

This tray has Rutgers, an improved beefsteak called ‘Delicious’ and Cherokee Purple.  They all seem to be doing great. 

image

In this tray I have had some damping off but have thinned out the worst of it.  I lost some. Evergreen, Big Rainbow, and Brandywine tomatoes, but except one pot of Evergreen there is still a tomato plant in each pot.

Damping off is caused by bacteria which can come from unsterilized pots, potting soil, or rain water.  Most seedlings will be strong enough to withstand it once they are a couple inches tall.  I did not know rain could cause such a problem and thought it would be good for them.  Lesson learned.  I guess I will be starting more Roma tomatoes this week.


Happy birthday to me February 11, 2013

Filed under: Life's Little Riches — revivalnatural @ 9:23 am
Tags:

Everyone kept asking what I had planned for my birthday and I kept telling them nothing.  Apparently they thought this meant I would be available to be suprised.  Me having nothing planned for my birthday really just meant I had nothing planned that would normally be considered a special, birthday related activity.  My friend Nicole, who I am staying with came out to bring me a birthday muffin and I was already gone to buy plant tags and then transplant seedling to my property.  Once everyone tracked me down I had to come home and make myself somewhat presentable before heading downtown to eat and explore the shops.  We had a good time AND I got my cold weather veggies transplanted.  What more could a girl want 🙂


February 9, 2013

Filed under: Life's Little Riches — revivalnatural @ 10:48 am

We raised bunnies when I was a child and I would like to raise them again. Housing is simple and can be made inexpensively and I like rabbit meat. The manure is great for gardens or wormbeds too.

Town & Country Gardening

New Zealand
Warm weather is upon us. It’s time to build that Rabbit Hutch that you have been thinking about all winter.

I had no idea how many worthless websites advertise ‘Free’ rabbit hutch and cage plans I would find on a google search. A full 95% are totally useless or bait and switch sites in an attempt to sell you something you can easily build for 1/4 their list price not to mention the cost of shipping.

Below is a list of good sites that I hope you will find useful.

Woodworkers Workshop Rabbit cage and nest box plans

Bass Equipment Supplier of rabbit cages, feeders and waterer’s Bass Equipment

Rabbits your secret survival tool in these uncertain economic times. Low wages, fewer hours on the job, higher food cost, rent and utilities increasing almost every month. How will you survive? The answer is a simple one, add rabbits to your…

View original post 698 more words


The potato plan

I posted the process of creating a bed for a double row of potatoes a couple weeks ago and, after a little research, I plan to plant companions in the bed tomorrow.  Plants from the cabbage family seem to grow well with potatoes, so most of my cold weather veggies can be planted in the middle of the potato rows.  This includes cabbage, kale, and broccoli.  In warmer weather beans and corn both do well with potatoes.  Perhaps I will plant beans here as the cabage family is finishing off in late spring.
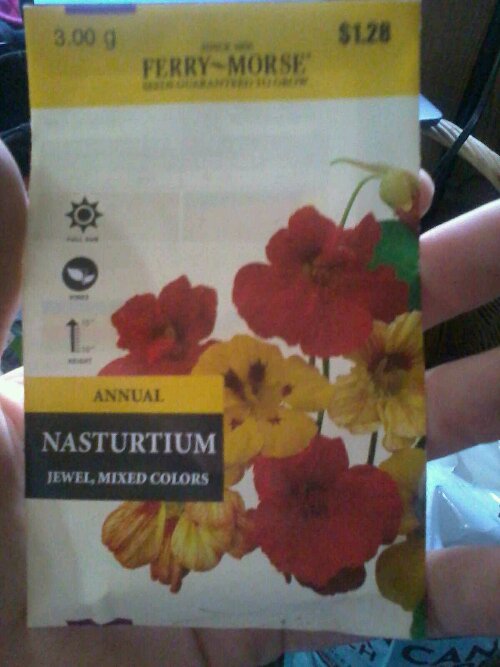
Some plants help to repel Colorado Potato Beetles.  These include tansy, nasturtium, coriander, catnip, flax, and lamium.  I already have nasturtium seeds and will sow them directly into the soil after the danger of frost has passed.  Nasturtiums also repel a wide range of other pests.  One possible problem is that they prefer poor soil.  I have not ammended this bed with any compost or manure so hopefully it will be poor enough for them.

image

If I plant beans and corn here at the same time as the nasturtium the vines, which generally stay under 2′ tall, should grow up the corn.  Eventually the beans may over take them but that is ok.  Nasturtium leaves and flowers are edible and delicious in salads.  I may add some flax, catnip, or coriander as well but I do not have a definate plan to do so.  I do not really use coriander in my cooking, nor do I have a cat or care for catnip tea.  Flax interests me but I know there is not the space for much.  Still, I would like to try my hands at making linen and do use flaxseed oil.  These are all things to consider when planting your companions.  Each plant should be useful to you as well as groupings being planted to benefit each other. 
You can also interplant crops that will grow quickly and be finished before potato digging time.  Radishes, scallions, spinach, and leaf lettuce can all be good choices for this.  Since I am not living on the property to be looking after such crops I do not plan to do this but if you are planting in the yard where you live and want the most productive space possible give it a try.  one nice thing with potatoes is that they store well in place so if a longer standing crop is planted over them you can just wait to dig the potatoes. This does leave them in a place where root pests can get at the though so keep that in mind when planting.
Some plants should not be planted near or after one another due to similar nutrient needs or similar disease and pest problems.  For potatoes avoid planting after or before tomatoes, eggplant and peppers.  A few others are rumored to increase the risk of blight as well so avoid cucumbers, raspberries, sunflowers, pumpkin, squash (both summer and winter) and tomatoes for this reason.  Tomatoes and potatoes seem to be especially good as passing pests and diseases back and forth so absolutely avoid planting them near each other or planting one after the other. 


Finally starting my tree tomatoes February 8, 2013

Filed under: Gardening — revivalnatural @ 7:06 pm
Tags: , , , , , ,

Ever since seeing a picture of a tomato plant trellised to look like a tree I have been excited to try one of them.  All it took was a quick search on e-bay and I was able to find “Giant Italian Tree Tomato” seeds from e-bay seller aprilshowers2010.  This was months ago so I do not know if there are more left or not.  You can try contacting the seller I got mine from or just do a search of your own and see what comes up.  The seller also sent along a couple of bonus seed packets, one labeled “Italian Heirloom” and the other “Roma” but I will not be planting the roma variety right now since I already have 6 pots with roma seeds from a different source.  I am going to start the Italian Heirloom and Giant Italian Tree tomatoes tonight. 
To be clear the “tree tomatoes” are not a tree.  They are simply an indeterminate variety of tomato that grows very large and can be trellised to look like a tree.  I am growing quite a variety of tomatoes already but this one still excites me.  The seller sent a sheet of “tomato basics” with tomato germinating, fertilizing, and pruning tips.
These will be getting a late start but there is still plenty of time left before spring.  I’m not sure how many more seedlings I can reasonably take care of in a travel trailer but hopefully at least 12 more since I plan on starting 6 pods each of the Italian Heirloom and Giant Italian Tree tomatoes.

image


Maybe it was a bad idea…

To leave my warm weather seedlings out in the storm last night.  I have been bringing them in if it is supposed to drop below 45F at night and leaving them out if it is not.  The well water here smells like sulfer and I figured the rain water would be good for them.  Now I am thinking I should have just collected some in buckets for them.  It did stay warm enough but it rained harder than I had anticipated, creating a problem I have never had to deal with before.  The splash deposited soil on the stems and leaves causing some to fall over and others to just look rough.  I tried cleaning them up this morning by spritzing them with a water bottle.  This did very little to help so I did my best to remove some of the caked on soil with my fingers.  They all still look a little rough but I think most will survive.  Tonight is supposed to get down to 39F so I have brought them in for the night.  Here is what they look like now.

image

cucumber

image

tomato

On the good side I know that the strong will survive and I want good, strong plants.  Time will tell just how much damage I have done.  In nature I suppose this is part of the natural selection process so with any luck this will actually pay off. 
My tray of cold weather seedlings is living outside full time now and most have been able to withstand the freezes we had last week with no harm. 

image

The spinach (bloomsdale long standing) although quite cold hearty germinated poorly.  I think it might have enjoyed warmer soil for germination and in the future I will start it on a heating mat if the temps are low.  I had trouble getting the broccoli going as well, but I already knew it prefered warmer conditions than the cabbage, collards, and other winter veggies.  The calabrese variety of broccoli seems to withstand cold better than the di cicco, but some of both have survived being frozen.  This Sunday I hope to get their bed ready and put them in the ground.  I plan on starting more broccoli and some cauliflower in a bed a few weeks from now but first I have to build the beds.  Earlier in the week I cleared the trees from the area where these beds will be.  I will do as much as I can this Sunday.  It is quite a process to go from raw woods to vegetable beds and takes time, especially working alone.  As always, I have planned a week of work for just one day.  Wish me luck and feel free to stop in and lend a hand if you are in the area.


Growing ginger February 3, 2013

Filed under: Gardening — revivalnatural @ 9:29 am
Tags: , , , , , , , , ,

Ginger is supposed to be pretty easy.  I decided to give it a try and wanted to share.  This is going to be another one of those posts that will require some updates as things progress but here it is.  I am basing what I am doing on what I have read and will be growing my ginger in a pot since it will not take frost or freezing at all.  I might try some in the ground once the cold snaps have passed.  It might just make it if I get it established over the summer and mulch it deeply for winter.  I will let you know but for now back to growing in a pot. 
First thing you need to do is go to the grocery store and find a nice plump chunk of ginger root.  I am lucky to have found organic ginger, but there is no reason not to use whatever ginger you can find in the store.  This is by far the easiest way to get a start on the type of ginger used for cooking and also medicine.  There are many types of ginger that are more ornamental and lovely to grow if you like.  I am more interested in growing food so the kind from the grocery store is the kind I want.

image

Pick out a nice plump section with buds on it where new growth will emerge.

image

a close up of what the buds look like

I have read a few different thing about what the next step should be.  Based on all of the reading I decided to let mine soak in water for a day.  If yours isn’t organic you may want to wash it, soak it and wash it again before planting.  This is because it may have a growth retardant on it which needs to be washed off.  If you do not get it off you might not get it to grow at all or it might be slow.  I do not really trust my organic ginger not to have anything on it plus it seemed like a good idea to soak it so it wouldn’t be so dried out on the surface.  Mine had a few buds so I broke it up a little to make separate plants.  I am starting them in one pot and from what I have read they like, or at least don’t mind, being crowded.

image

Lay them horizontally with the buds facing up.  They do not need deep soil so you can use a shallow container or only fill the pot part way.  I am using a mix of my native soil ammended with peat and a little bonemeal.  My native soil is very dark and rich looking but sandy.  Ginger likes well drained soil that is evenly moist with plenty of organic matter so the extra peat will help with that and my native soil is sandy enough to drain well.  If your native soil is heavy, clay soil you may want to add large amounts of compost and some sand to the mix.  Be careful adding sand to clay heavy soil because you could end up making some primative concrete instead of goot potting soil.  Clay needs enough organic matter added to be loose and airy, then you can add some sand to it.  If you have really heavy soil you might be better off not using your native soil at all.  You will really just have to judge this for yourselves though. 
Cover the ginger with a small amount of soil.  It likes to be near the surface and planting too deep can cause problems so I left mine peaking out a bit.

image

Water well from the top so any air pockets have soil washed into them.  After that just keep soil evenly moist.  In warm weather set the pot out in dappled shade.  Add mulch to the top if the soil is drying out too quickly. Keep inside durning cold weather.  They are a forest floor plant and like some shade so you shouldn’t need a grow light.  I don’t have any other tips on this since it is my first try.  I’ll keep you posted on the progress.